If you’re just getting started using Azure one of the first things you might be asked to do is create a site-to-site vpn connection between your on-premises network and Azure. In this post I will walk through setting up an Azure VPN with an on-premises network. Before we get started there are some requirements for your on-premises environment.
On-Premises Requirements:
- On-premises endpoint
- On-premises public IP
- On-premises private subnet
Resources required in Azure to setup a Site-to-Site VPN:
- Virtual Network Gateway
- Virtual Network
- Local Network Gateway
- Public IP address
- Connection
The Virtual Network Gateway is the resource that ties all of other components together when setting up your VPN. Let's get started creating that resource. From the portal choose Create a Resource and search for "Virtual Network Gateway".
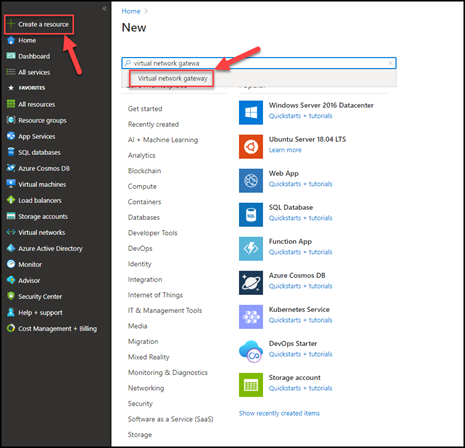
Hit create to get the Virtual Network Gateway settings page.
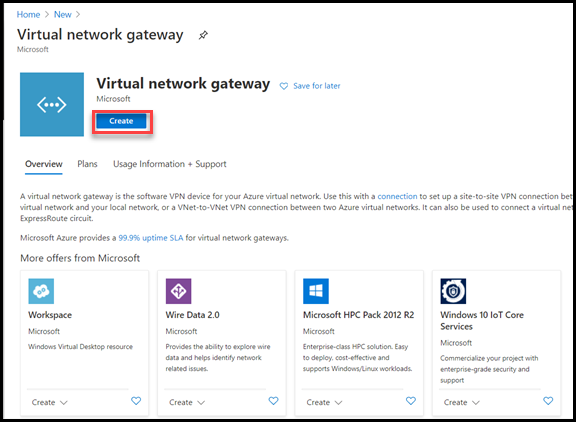
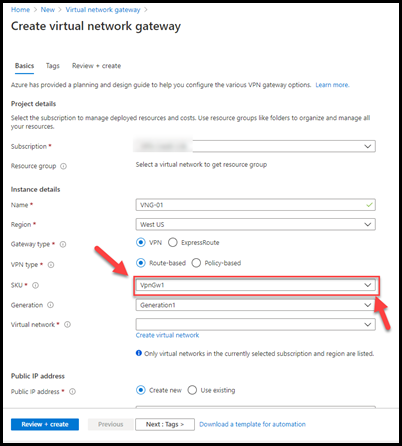
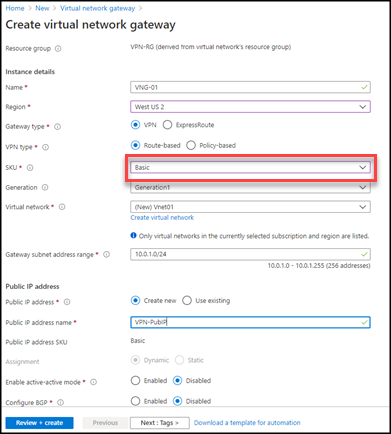
Here is the settings page for the Virtual Network Gateway. All of the settings with a red asterisk are required. We will create a Virtual Network and Public IP from this settings page. Please make note that even though I changed the SKU to Basic it reverted back to the default of VpnGw1. After you've made all changes to the settings make sure you set the SKU type back to Basic (or whatever SKU you decide on), before proceeding. You can go with the defaults I have below or change them to something else. Go ahead and choose Create virtual network
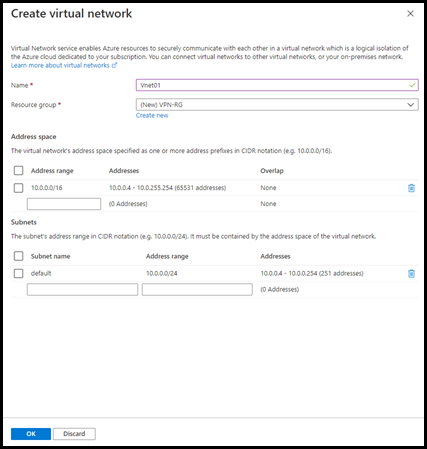
After you've set the required fields choose to Create a Virtual Network. Give it a name and enter a network and subnet or you can go with the defaults and hit Ok.
Choose to create a new Public IP address and give it a name unless you already have one setup. Again, make sure your SKU has not changed and then hit Review + Create.
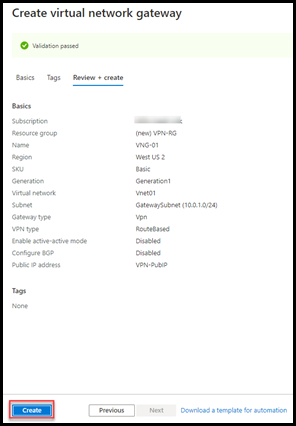
Confirm the settings and then hit Create
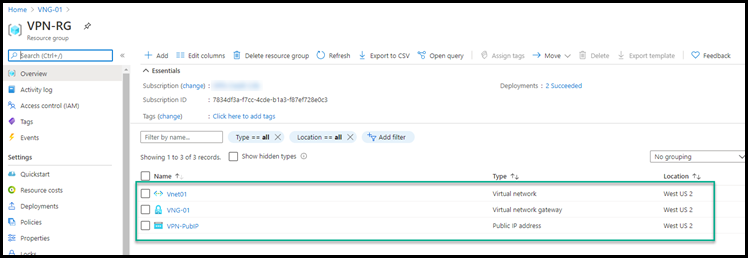
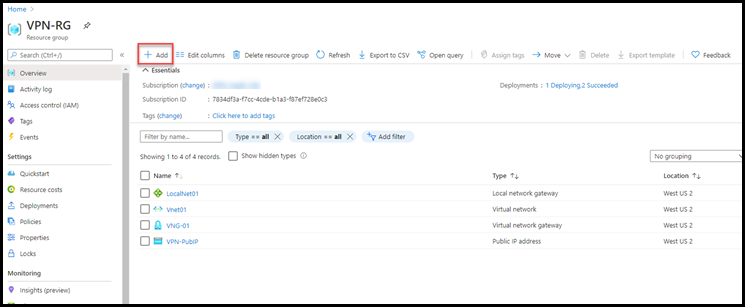
We now have three of the five components necessary to setup the VPN.
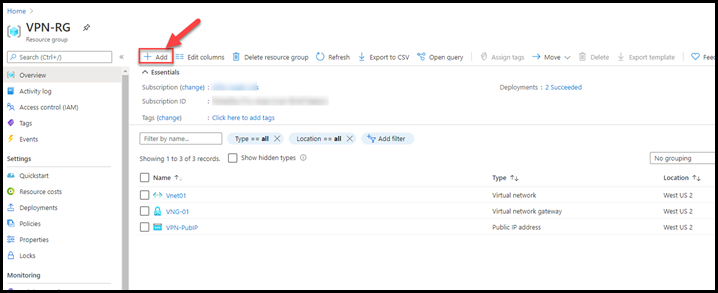
We can now add the local network gateway. Hit +Add
Type in Local Network Gateway in the search to find the resource.
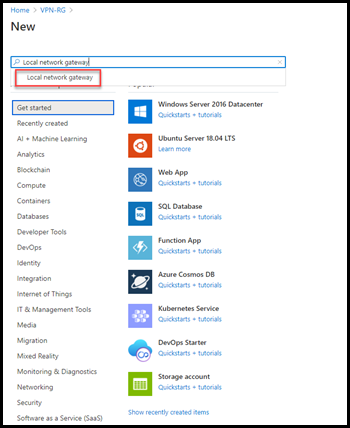
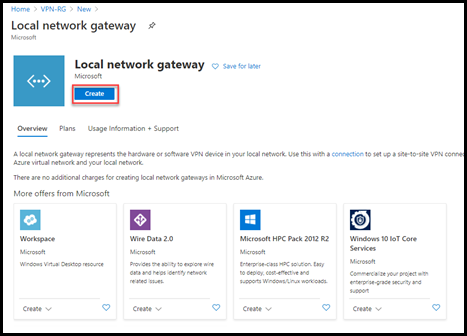
Create the Local Network Gateway resource
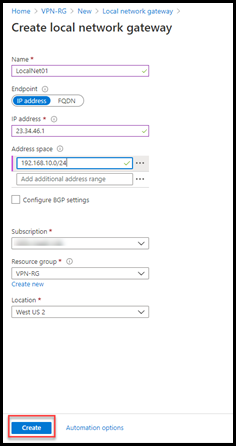
Enter the subnet for your on-prem network and the public IP for your on-prem device
We need to add a Connection resource to connect our VPN. Choose +Add again.
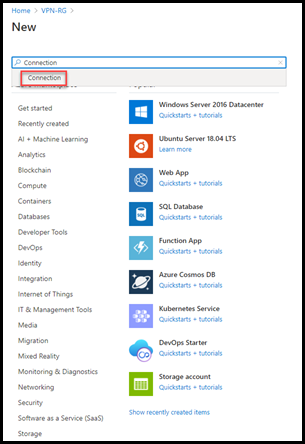
Search Connection to find the resource.
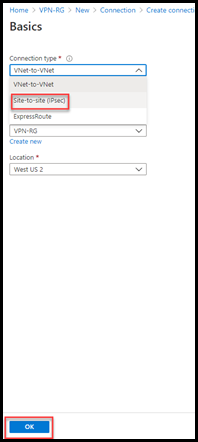
Choose Site-to-Site as the connection type.
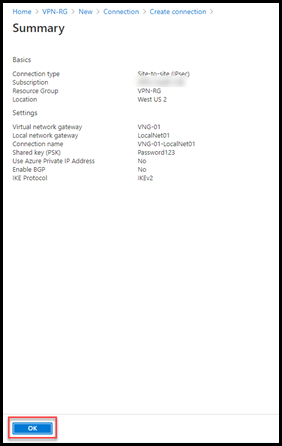
Verify the Connection settings and hit Ok
Now all of our VPN resources are created
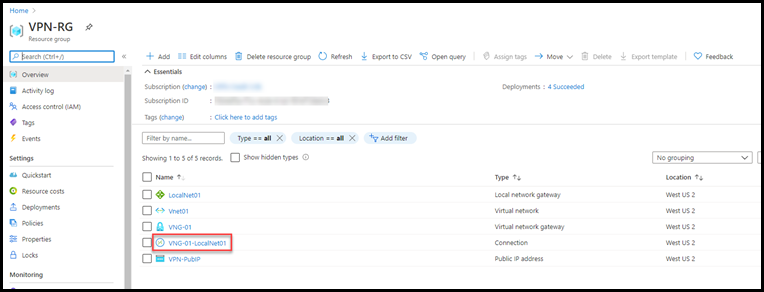
Open the Connection resource and download the configuration. This will give us the needed information for our on-prem device.
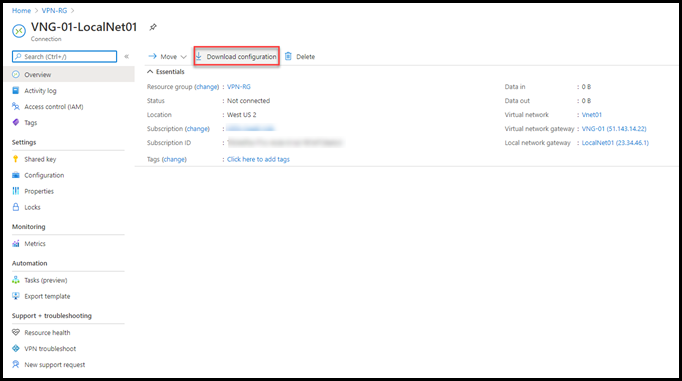
Change the device type to the one you have on-prem. If it's not listed choose Generic and then hit the Download Configuration button.
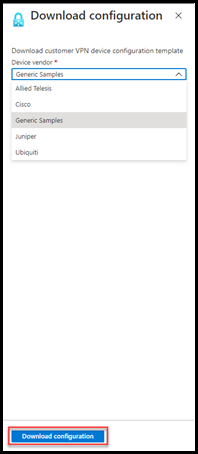
Open the configuration file and make the necessary changes to your on-prem device to create the VPN connection.

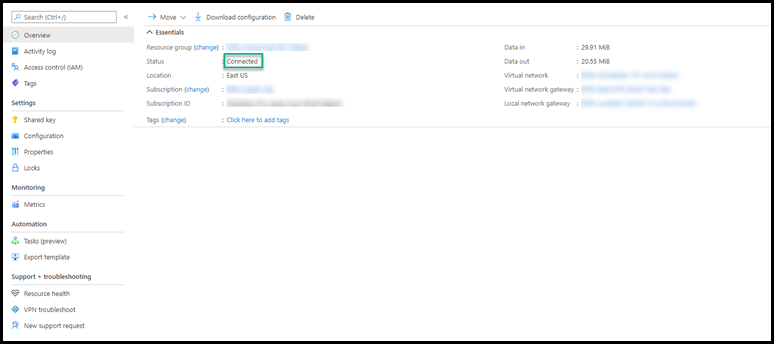
After you've created the VPN settings on your on-prem device go back to the Connection in the Azure portal and refresh the page. You should now have
a connection between your on-prem and Azure.
References:
https://docs.microsoft.com/en-us/azure/vpn-gateway/vpn-gateway-about-vpn-gateway-settings


